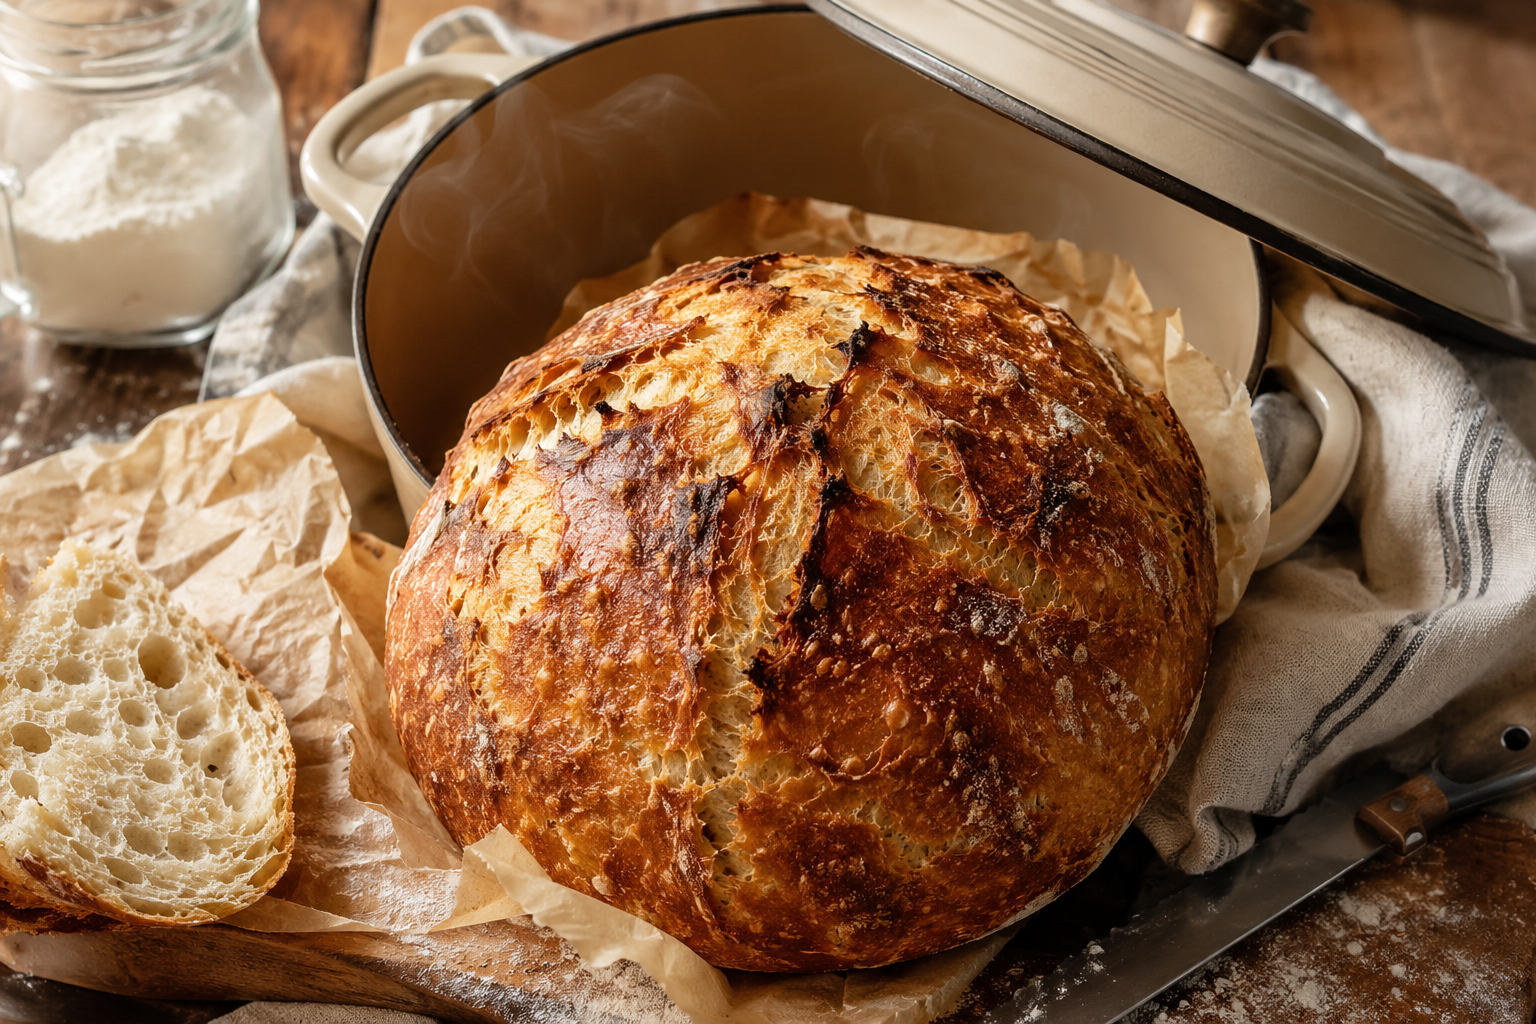
The reason Dutch oven bread produces a bakery-quality crust has to do with steam. Professional bread ovens inject steam during the first part of baking, which keeps the exterior of the dough pliable long enough for the loaf to expand fully before the crust sets. Home ovens can’t do this.
A Dutch oven solves the problem by trapping the moisture that the dough releases during the first twenty minutes of baking. The lid creates a steam environment inside the pot that replicates what a professional deck oven does. When the lid comes off for the second half of baking, the trapped steam has done its job and the crust finishes dry and hard.
Le Creuset and Staub Dutch ovens are the most common vessels for this — their tight-fitting lids and heavy cast iron walls are well suited for the high oven temperatures involved. A Lodge cast iron Dutch oven handles the same job at a fraction of the price and the result is identical.
The dough — mix it the night before
This is a no-knead recipe. The gluten develops overnight through a long, slow fermentation rather than through physical kneading. The active time is about five minutes the night before and twenty minutes the next day.
In a large bowl: 3 cups of bread flour, 1 and a quarter teaspoons of salt, a quarter teaspoon of instant yeast. Stir to combine.
Add 1 and a half cups of room temperature water. Mix with a wooden spoon or your hand until no dry flour remains — the dough will be shaggy and sticky. This is correct. Don’t add more flour.
Cover the bowl tightly with plastic wrap or a clean kitchen towel. Leave at room temperature for twelve to eighteen hours. The longer end produces better flavor.
What the dough looks like after overnight fermentation
After twelve to eighteen hours the dough should have roughly doubled and the surface should be covered with bubbles. It will look wet and somewhat deflated when you first lift the cover — this is normal. The bubbles tell you the fermentation has worked.
Shaping
Flour a work surface generously. Turn the dough out — it will be sticky and loose. Flour the top of the dough. Fold it onto itself two or three times, working quickly. The goal is a rough ball shape, not a perfectly smooth one.
Place the shaped dough seam-side down on a piece of parchment paper. Cover loosely and let it rest for thirty minutes to an hour while the oven preheats.
The preheat — this part matters
Put the Dutch oven — lid on — into the oven while it preheats to 500°F. The pot needs to be ripping hot when the dough goes in. This is what creates the initial burst of crust development that makes Dutch oven bread look and taste the way it does.
Leave the Dutch oven in the preheating oven for at least thirty minutes after it reaches temperature — forty-five minutes is better.
Baking
Use oven mitts. The Dutch oven is extremely hot.
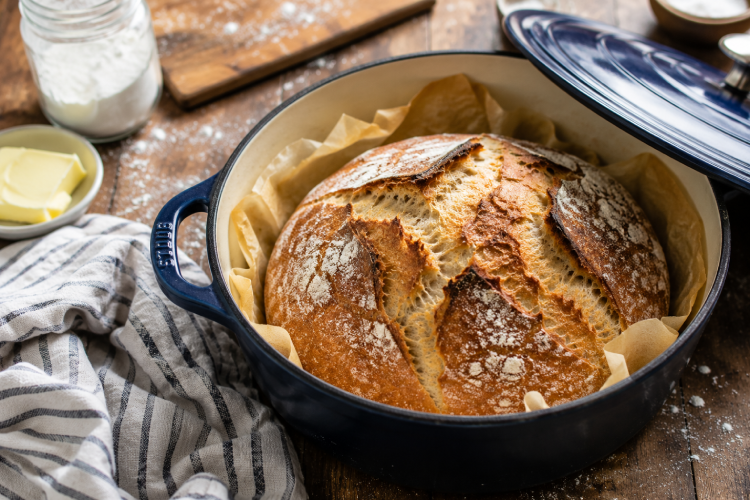
Lift the pot out of the oven, remove the lid. Pick up the parchment paper with the dough on it and lower the whole thing into the pot. Replace the lid immediately.
Bake at 500°F with the lid on for twenty minutes. The steam trapped inside is doing its work.
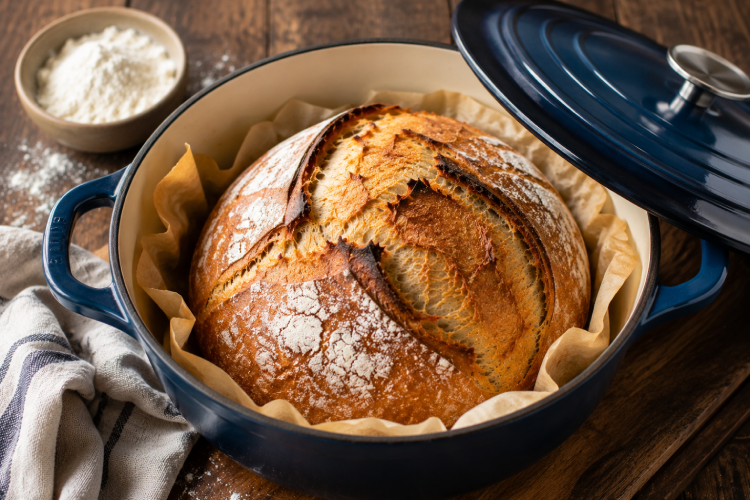
After twenty minutes, remove the lid. Reduce the oven to 450°F. Bake for another twenty to twenty-five minutes until the crust is deep golden brown — darker than you might expect. The dark crust is not burning, it’s caramelization that adds flavor.
Cooling
Remove the bread from the Dutch oven immediately and let it cool on a wire rack for at least one hour before cutting. The interior is still cooking from residual heat during this time — cutting into it early produces a gummy interior even if the exterior looks done.
The crackling sound as the bread cools is the crust contracting. It’s a good sign.
Pan: 5 or 6-quart Dutch oven — Le Creuset, Staub, or Lodge cast iron Active time: 10 minutes, plus 12-18 hours hands-off fermentation Baking time: 45 minutes Makes: 1 loaf